Android - Creating a List of Cards using RecyclerView
23 Aug 2018
Code for the this tutorial is available on my GitHub.
In the RecyclerView model, several components work together to display a scrolling list. We add a
RecyclerView object that acts as the container for the list of items. As a beginner to Android development, it was hard
for me to wrap my head around all the components that makes RecyclerView possible. So, this guide aims to help
anyone display a list of items using RecyclerView and MaterialComponents.
Add the support library for RecyclerView and MaterialDesign.
To access RecyclerView and MaterialComponents we need the v7 support library and the material design library.
Open the build.gradle file and add the following dependencies.
dependencies {
    implementation 'com.android.support:recyclerview-v7:28.0.0-rc01'
    implementation 'com.google.android.material:material:1.0.0-rc01'
}Inherit app theme from MaterialComponents
To use the latest material design components in your app the base theme should inherit from the theme provided by MaterialComponents.
Change the parent of you main AppTheme to Theme.MaterialComponents.Light.DarkActionBar in your styles.xml.
styles.xml
<!-- Base application theme. -->
<style name="AppTheme" parent="Theme.MaterialComponents.Light.DarkActionBar">
    <item name="colorPrimary">@color/colorPrimary</item>
    <item name="colorPrimaryDark">@color/colorPrimaryDark</item>
    <item name="colorAccent">@color/colorAccent</item>
</style>
Add RecyclerView to your layout file
The RecyclerView widget should be added to your activity layout file.
activity_main.xml
<?xml version="1.0" encoding="utf-8"?>
<androidx.constraintlayout.widget.ConstraintLayout
    xmlns:android="http://schemas.android.com/apk/res/android"
    xmlns:app="http://schemas.android.com/apk/res-auto"
    xmlns:tools="http://schemas.android.com/tools"
    android:layout_width="match_parent"
    android:layout_height="match_parent"
    tools:context=".MainActivity">

    // Recycler View widget
    <androidx.recyclerview.widget.RecyclerView
        android:id="@+id/recycler_view"
        android:layout_width="match_parent"
        android:layout_height="match_parent"
        android:scrollbars="vertical"/>

</androidx.constraintlayout.widget.ConstraintLayout>
Create the layout for a single card list item
We need to create the layout for a single card item in a new layout file: list_item.xml. This card layout will be repeated
to display the list of cards. Here MaterialCardView and MaterialButtons are used to create the layout.
A single list item
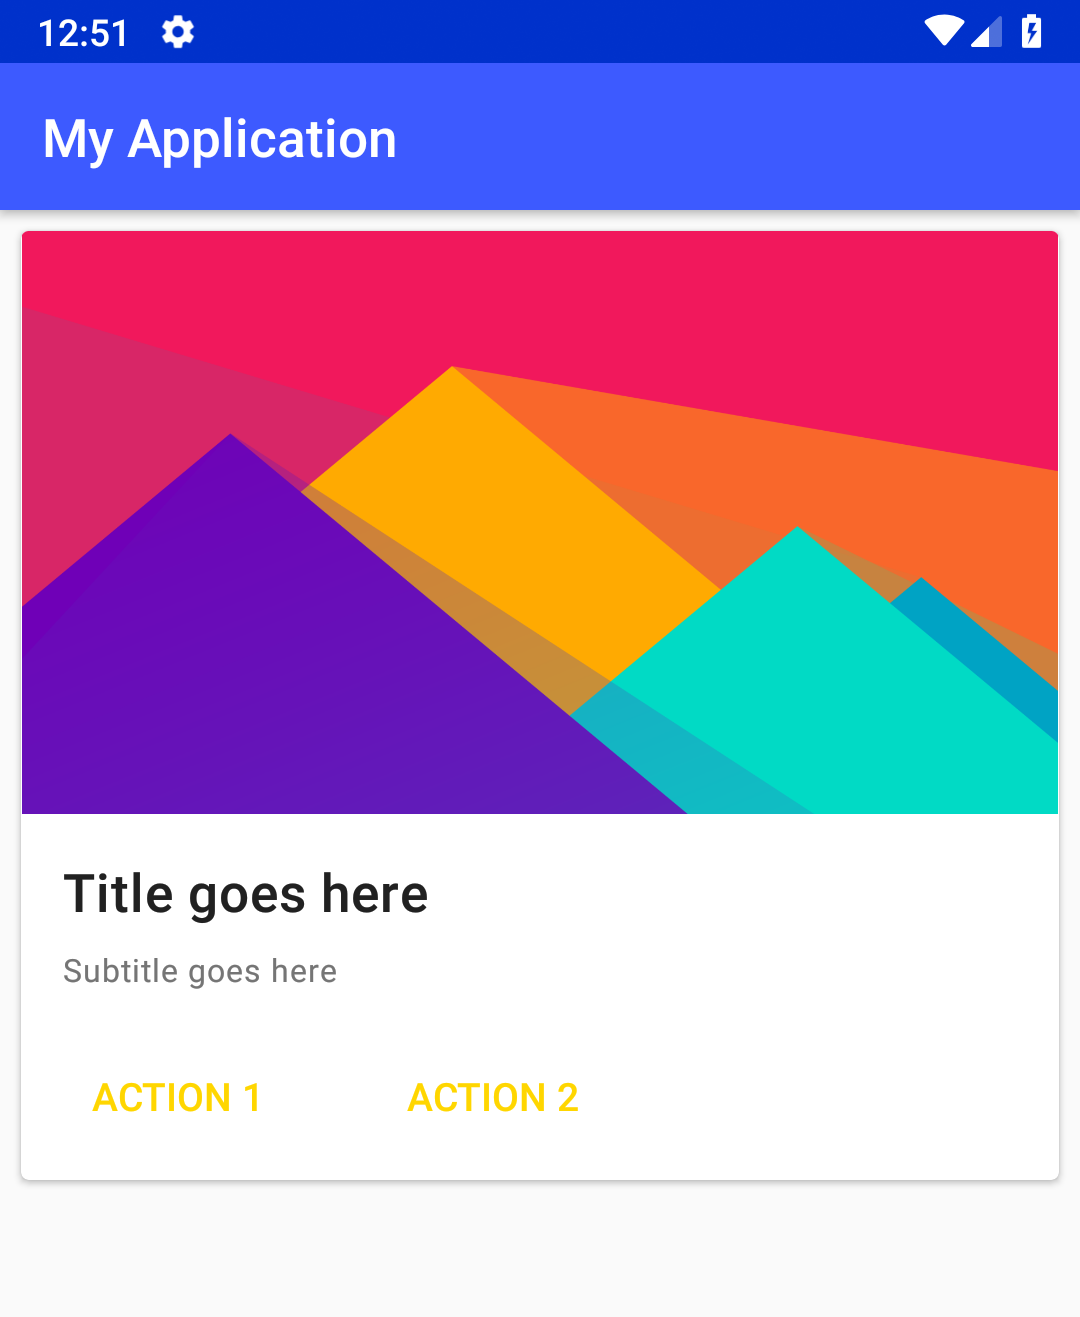
Modify the cardCornerRadius and cardElevation attributes in the MaterialCardView to change the corner radius and shadow of the card.
I used the styles provided by MaterialComponents, for example the button above has a style of Widget.MaterialComponents.Button.TextButton.
list_item.xml
<?xml version="1.0" encoding="utf-8"?>
<?xml version="1.0" encoding="utf-8"?>
<com.google.android.material.card.MaterialCardView
    xmlns:android="http://schemas.android.com/apk/res/android"
    xmlns:tools="http://schemas.android.com/tools"
    android:layout_width="match_parent"
    android:layout_height="wrap_content"
    xmlns:app="http://schemas.android.com/apk/res-auto"
    app:cardCornerRadius="3dp"
    app:cardElevation="2dp">
    <androidx.constraintlayout.widget.ConstraintLayout
        android:layout_width="match_parent"
        android:layout_height="wrap_content"
        android:layout_marginBottom="8dp">

        <ImageView
            android:id="@+id/imageView"
            android:layout_width="match_parent"
            android:layout_height="wrap_content"
            app:layout_constraintStart_toStartOf="parent"
            app:layout_constraintTop_toTopOf="parent"
            android:adjustViewBounds="true"
            app:srcCompat="@drawable/list_image" />

        <TextView
            android:id="@+id/card_title"
            android:layout_width="wrap_content"
            android:layout_height="wrap_content"
            android:layout_marginStart="16dp"
            android:layout_marginLeft="16dp"
            android:layout_marginTop="16dp"
            android:text="Title goes here"
            style="@style/TextAppearance.MaterialComponents.Headline6"
            app:layout_constraintStart_toStartOf="parent"
            app:layout_constraintTop_toBottomOf="@+id/imageView" />

        <TextView
            android:id="@+id/card_subtitle"
            android:layout_width="wrap_content"
            android:layout_height="wrap_content"
            android:layout_marginTop="8dp"
            android:text="Subtitle goes here"
            style="@style/TextAppearance.MaterialComponents.Caption"
            app:layout_constraintStart_toStartOf="@+id/card_title"
            app:layout_constraintTop_toBottomOf="@+id/card_title" />

        <com.google.android.material.button.MaterialButton
            android:id="@+id/action_button_1"
            style="@style/Widget.MaterialComponents.Button.TextButton"
            android:layout_width="wrap_content"
            android:layout_height="wrap_content"
            android:layout_marginTop="16dp"
            android:text="ACTION 1"
            android:textSize="15sp"
            android:textAppearance="
            @style/TextAppearance.MaterialComponents.Headline6"
            app:layout_constraintStart_toStartOf="@+id/card_subtitle"
            app:layout_constraintTop_toBottomOf="@+id/card_subtitle" />

        <com.google.android.material.button.MaterialButton
            android:id="@+id/action_button_2"
            style="@style/Widget.MaterialComponents.Button.TextButton"
            android:layout_width="wrap_content"
            android:layout_height="wrap_content"
            android:layout_marginStart="32dp"
            android:layout_marginLeft="32dp"
            android:text="ACTION 2"
            android:textSize="15sp"
            android:textAppearance="
            @style/TextAppearance.MaterialComponents.Headline6"
            app:layout_constraintBottom_toTopOf="@+id/action_button_1"
            app:layout_constraintStart_toEndOf="@+id/action_button_1"
            app:layout_constraintTop_toBottomOf="@+id/action_button_1" />
    </androidx.constraintlayout.widget.ConstraintLayout>
</com.google.android.material.card.MaterialCardView>
Create a simple data model
We will create a simple class that will hold the data for each and every card list item.
public class DataModel {
    private int imageDrawable;
    private String title;
    private String subTitle;

    public DataModel(int id) {
        imageDrawable = R.drawable.list_image;
        title = String.format(Locale.ENGLISH, "Title %d Goes Here", id);
        subTitle = String.format(Locale.ENGLISH, "Sub title %d goes here", id);
    }

    public int getImageDrawable() {
        return imageDrawable;
    }

    public String getTitle() {
        return title;
    }

    public String getSubTitle() {
        return subTitle;
    }
}
Create the View Holder
Inside your Adapter create a static ViewHolder class that extents RecyclerView.ViewHolder.
The ViewHolder will be used to cache the the view objects associated with each list item. The RecyclerView creates
as many ViewHolders as required to fill the screen plus a couple of extra in case the user scrolls.
When the user scrolls, the ViewHolder at the top that goes out of the window is bind with new data and is the shown
at the bottom.
public class MyAdapter extends RecyclerView.Adapter<MyAdapter.MyViewHolder> {

    private List<DataModel> dataModelList;
    private Context mContext;

    // View holder class whose objects represent each list item

    public static class MyViewHolder extends RecyclerView.ViewHolder {
        public ImageView cardImageView;
        public TextView titleTextView;
        public TextView subTitleTextView;

        public MyViewHolder(@NonNull View itemView) {
            super(itemView);
            cardImageView = itemView.findViewById(R.id.imageView);
            titleTextView = itemView.findViewById(R.id.card_title);
            subTitleTextView = itemView.findViewById(R.id.card_subtitle);
        }

        public void bindData(DataModel dataModel, Context context) {
            cardImageView.setImageDrawable(ContextCompat.getDrawable(context, R.drawable.list_image));
            titleTextView.setText(dataModel.getTitle());
            subTitleTextView.setText(dataModel.getSubTitle());
        }
    }
Here we have an ImageView and two TextViews that display the card image, title and subtitle. The constructor
uses findViewById to get a reference to the widgets in the layout file. We have an addition function bindData()
that takes a DataModel and binds the correct data in the ImageView and TextView.
Complete the List Adapter
The MyAdapter class should extend RecyclerView.Adapter and we need to override the functions
onCreateViewHolder(), onBindViewHolder() and getItemCount().
The constructor takes a list of DataModel and the activities context. This list will be used to populate our RecyclerView.
The onCreateViewHolder() function is called when the RecyclerView creates the required number of ViewHolders. Here we
inflate a new list_item layout and use it to return a new ViewHolder.
The onBindViewHolder() is used to bind data to an existing ViewHolder. Since we already have a bind method
in our ViewHolder class, we can user that to set the correct data. The position variable will have the index of the
item the RecyclerView wants to load.
public class MyAdapter extends RecyclerView.Adapter<MyAdapter.MyViewHolder> {

    private List<DataModel> dataModelList;
    private Context mContext;

    // View holder class whose objects represent each list item

    public static class MyViewHolder extends RecyclerView.ViewHolder {...}

    public MyAdapter(List<DataModel> modelList, Context context) {
        dataModelList = modelList;
        mContext = context;
    }

    @NonNull
    @Override
    public MyViewHolder onCreateViewHolder(@NonNull ViewGroup parent, int viewType) {
        // Inflate out card list item

        View view = LayoutInflater.from(parent.getContext())
                .inflate(R.layout.list_item, parent, false);
        // Return a new view holder

        return new MyViewHolder(view);
    }

    @Override
    public void onBindViewHolder(@NonNull MyViewHolder holder, int position) {
        // Bind data for the item at position

        holder.bindData(dataModelList.get(position), mContext);
    }

    @Override
    public int getItemCount() {
        // Return the total number of items

        return dataModelList.size();
    }
}
Set the RecyclerView in the activity.
The last step is to get a reference to the RecyclerView and set the layout manager and our adapter.
public class MainActivity extends AppCompatActivity {
private RecyclerView mRecyclerView;
private RecyclerView.Adapter mAdapter;
private RecyclerView.LayoutManager mLayoutManager;
@Override
protected void onCreate(Bundle savedInstanceState) {
super.onCreate(savedInstanceState);
setContentView(R.layout.activity_main);
mRecyclerView = findViewById(R.id.recycler_view);
List<DataModel> dataModelList = new ArrayList<>();
for (int i = 1; i <= 20; ++i) {
dataModelList.add(new DataModel(i));
}
// use this setting to improve performance if you know that changes
// in content do not change the layout size of the RecyclerView
mRecyclerView.setHasFixedSize(true);
// use a linear layout manager
mLayoutManager = new LinearLayoutManager(this);
mRecyclerView.setLayoutManager(mLayoutManager);
// specify an adapter and pass in our data model list
mAdapter = new MyAdapter(dataModelList, this);
mRecyclerView.setAdapter(mAdapter);
}
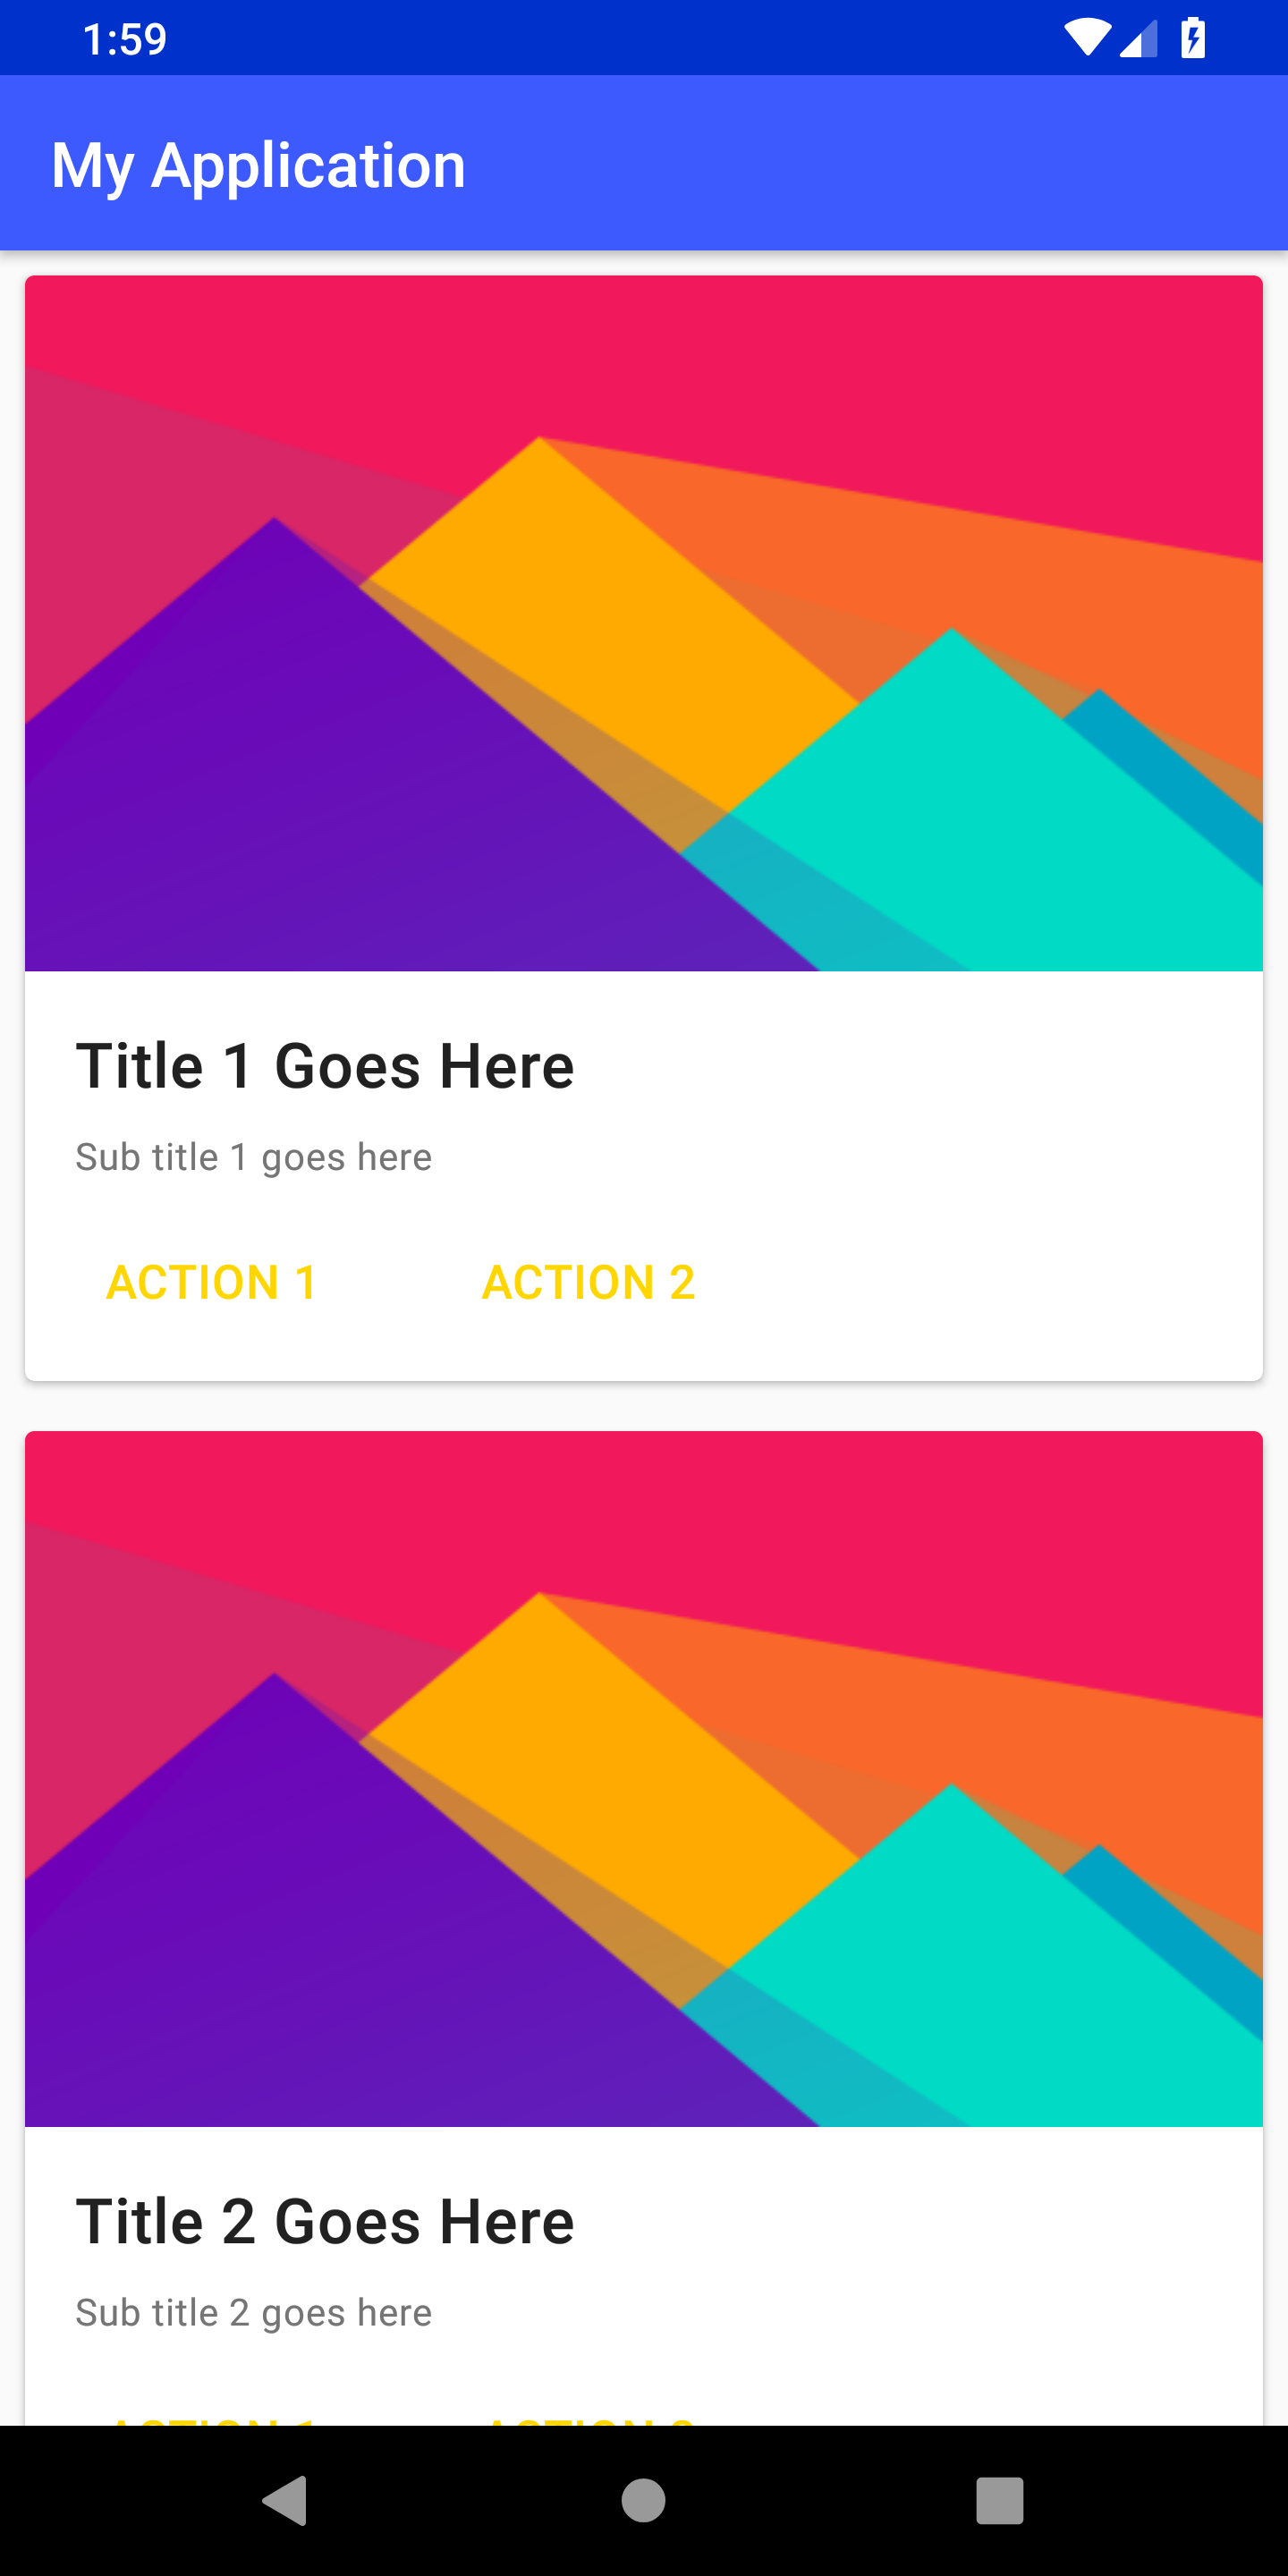
}Final Layout